
Single Ink Limits
The ink limit is the amount of ink a particular type of media is capable of absorbing. Ink limits will vary depending on the selected printer resolution. Higher resolutions dispense more ink, and therefore have more trouble with ink absorption.
- Click the Print Ink Limit Test button.
- Examine the test print for over-saturation.
When looking at the test print, you should check the print to see if the swatches are over-saturated. Symptoms include ink bleeding, color mixing and ink that takes an excessive amount of time to dry.

|

|
| Ideal output |
Over-saturated swatch |
- For each color channel, do the following:
- Determine the swatch highest on the coverage scale where over-saturation does not occur.
- If any swatches are identical to each other, choose the swatch that is lower on the coverage scale to save ink.
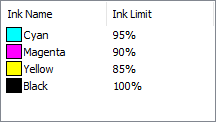
- Enter the resulting increments in the Ink Limit field. You can enter any number in between increments. For example, if 85% is too low and 90% is too high, you can enter 87%.
- If your test print looks fine, and the colors do not appear to be over-saturated, continue creating a profile.
You may need to do one or more Ink Limit test prints to determine the appropriate percentages. Be careful not to over-limit the swatches. Over-limiting will reduce the number of viable points with which to produce a profile.
- If the test print is not satisfactory, adjust the Ink Limits for the color channels in use by editing the Ink Limit values.
-
Click the Print Ink Limit Verification button to print a test with the new Ink Limit values applied.
-
Repeat steps 2 through 4 until a satisfactory set of ink limits has been determined.
-
Click Next.